At Web Profit Maximiser, we’re all about helping you build the foundation for your marketing strategy.
Let’s face it, when you are running a business, it can be difficult to find time to “fit” social media into your busy day.
So in this post, we want to show you how to create a social media calendar, which is how you can save time while being more strategic and effective.
To start things off, get your goals in order. What would you like your social media to accomplish for your customers and business? Also, consider things like your page’s language and visual tone to make sure your content has some focus. Determine how frequently you would like to post.
It’s also important to align your social media platforms with your other marketing efforts such as your events, blogs on your website, and email newsletters. Link them on your page and include a call to action to sign up for your content.
Once you’ve got your goals in place, it’s time to get down to the details. Start by creating “content pillars”. This means assigning a theme to each post per day of the week.
For example, you could focus on educational posts on Mondays, inspirational posts on Tuesdays, posts about company culture on Wednesdays, and so on.

When you do the above, it causes your brain to really focus. This focus makes it easier and faster to come up with content.
Now just look at the month’s calendar and plot out how many of each post you’ll need. For instance, there are five Mondays in September, meaning you’ll need to create five different educational posts for that month.
Next, block off a specific time for you to work on your social media marketing calendar. You can do this on a daily, weekly, or monthly basis. You can also try creating posts in batches of two weeks’ worth of content at a time, starting with all educational posts, gathering reviews of your product, etc.
If you’re delegating this to a team, use a productivity tool to make sure everyone is in sync and you can track everyone’s work.
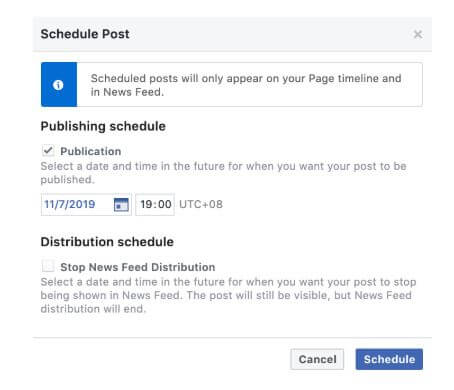
After you’ve got all your content ready, schedule your posts so you don’t have to keep uploading a post on Facebook every day! Here’s a step by step guide to scheduling a post:
On your page, begin to write your post.

Next, click on the settings button in the lower-left corner.
This will give you the option to schedule a post, save it as a draft, or backdate it. Select Schedule.
A small window will pop up, where you can select the date and time you would like your post to be uploaded.

And that’s it!
You now have a guide for what you post on your social media pages! This not only makes it much easier to think of what to share daily but also builds consistency on your page so your audience knows what to expect. Want ideas on what to post about? We’ve got you covered! Check out our guide to finding fresh content for your social media calendar!
Hey savvy business owner… Want to get hot and fresh marketing strategies to give your business the edge… AND emails so valuable you will save them?
Enter Your Best Email Below

| Recommended articles for you: Get back on track to meeting your midyear goals How We Tripled A Functional Medicine Practice Using Facebook [Case Study] Stuck on Ideas For Your Social Media? |
We are a Marketing Consultant in Sydney.
*first photo via pexels.com
